![]()
![]()
Getting started with the 1:350 scale MiniCraft Titanic

So, you’re going to build a Titanic model from the 1:350 MiniCraft kit. What do you do now, and how do you go about it?
The simplest approach, of course, is to just build the model from the kit. This will give you a nice-looking model with a decent amount of detail, and you’ll be able to complete it in a few weeks. This is a good option for kids, and those who don’t want their Titanic model to become a major hobby.
However, a serious model builder will probably want something more. Using the wealth of historical information that can be gleaned from this website, you can build a museum-quality model of exacting historical detail and scale accuracy. TRMA has uncovered countless details that were hitherto unknown about Titanic’s construction and outfitting, as well as details of the MiniCraft kit that are historically inaccurate. In addition, there are commercially available parts and enhancements that are designed to replace many of the stock parts and fittings for a more highly-detailed look.. Some modelers also light their models for extra visual impact.
In between, of course, there are modelers who want their ship to become something more than a basic kit, but don’t care about historical detail down to the nth degree. The TRMA website can help you build whatever level of model you want.
Key Informational Resources available on this website
There are two types of resources available: on-line, printable information for all aspects of modeling the ship, and a forum by which you can get your questions answered and keep abreast of the latest information and discoveries.
The Rivet Counter Scale Modeling Tutorial –
This is an essential guide for any serious modeler. It has over 35 chapters, divided into subjects such as Hull, Doors, Bridge, Cranes, etc. It’s a great resource for three reasons. First, it will tell you what details in the MiniCraft kit are historically inaccurate. Second, it will tell you what details are missing from the kit; and third, it will tell you what parts are lacking in detail. And for all three, it will tell you how to replace, improve or scratchbuild them as necessary.
The easiest way to study this in detail and use it at your modeling bench is to print out the Tutorial and assemble the pages in a loose-leaf notebook. As you read through the Tutorial, you can decide which details you want to skip and which are important for you.
David Cotgreave’s Vent Inventory –
Similar to the Tutorial, but focuses on Titanic’s vents. These are the small motor, duct and cowl structures that dot the Titanic’s upper decks. Many are historically inaccurate, missing, or lacking detail, and for the most serious modeler who wants to improve on the kit vents, this is an indispensable reference.
Art Braunschweiger’s Scale Rigging Tables and Bruce Beveridge’s Rigging plan –
The Rigging Tables provide the correct sizes of thread to use for the final rigging of your model. Selecting the proper scale size will avoid a "clunky" look from too-heavy thread. The rigging plan will show you what lines go where in a much clearer format than the MiniCraft plans, and the tables will ensure that you won’t forget any.
The Fiber Optic Tutorial –
For those interested in lighting their model, this will help you plan and install both your interior light source and the fiber optics.
The Titanic Forum -
This is where new information comes to light, quite often with some interesting debates by some of the foremost experts on Titanic’s construction and operation. It’s also a great source of modeling "how-to"s, plus your avenue to get that tough question answered.
Reviewing past postings as well as the Forum archives is a great way to gain a wealth of information beyond the Tutorial. Serious modelers should spend several weeks reviewing ALL the previous postings on the Forum and the archives, stopping and reading those items of interest. Many are worth printing for future reference.
Posting a modeling-related question, or a question about anything at all Titanic-related for that matter, is easy. The experts and regular forum visitors welcome newcomers and will gladly answer any question you have. But do a bit of looking before you post! There is a search function available that will check all past postings, including the archives, for anything matching the subject you enter. Many questions posed by newcomers can often be answered right away by searching first. (It’s also considered "bad form" to post a question without trying to find the answer first. Do it more than once and you may give the unwanted impression that you just want the answers handed to you without doing any work.)
A modeling reference in book form
There is now a book that specifically addresses this subject: RMS Titanic – A Modeler’s Guide . Written by Peter Davies-Garner, a TRMA trustee and expert modeler, it’s full of large, clear drawings of countless fittings, decks and other details. It will be available in June through Amazon.com, but can be pre-ordered now. See the link on the home page.
Titanic CAD Plans (the Hahn-Beveridge plans)
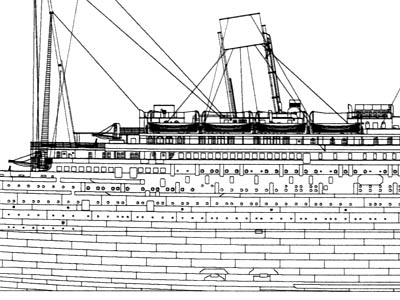
These are available for purchase through a link on the home page. They show in exacting detail every aspect of the hull, deckhouses, roofs, funnels, and all other exterior details. They include both full-profile drawings, as seen below, as well as drawings of the individual deckhouses, bulkheads, funnels and walls from all sides. Detailed drawings of every vent are also shown. Essential for any dedicated modeler.

Bruce Beveridge’s General Arrangement Plans
Like the Hahn plans, these are outstanding for showing close-up details of doors, portholes, and other features. They are also the only plans that show the interior of the ship with exacting detail and accuracy. This includes all the crew-only spaces, as well as the engine room and cargo spaces. All information was taken from original Harland & Wolff specifications and make a fascinating study as well as a useful modeling aid.

Photographs and visual references
Serious modelers will also want some good references to see some of the fine details they’re modeling. While photographs of Titanic are relatively few in number, there are some good books that have assembled the best ones. In addition, there’s the art of Ken Marschall, one of the world’s foremost Titanic’s historians whose images show stunning detail and accuracy.
Some of the best books for modeling are listed here:
Ken Marschall’s Art of Titanic by Rick Archbold. The complete collection of Ken Marschall’s paintings. Great for showing overall ship. Mostly depicts Titanic from a distance, but the detail is clear and exacting. Also a definitive reference for what the colors should look like. Every serious modeler should have this one.
Father Browne’s Titanic Album by E.E.O’Donnell. A collection of photographs taken by an amateur photographer on board Titanic during the first leg of her maiden voyage. Useful photos for the modeler are mostly restricted to deck shots, but does have a couple very good hull closeups and the only known forecastle photograph.
Anatomy of the Titanic by Tom McCluskie. Construction photographs, mostly very good hull shots, including good bow and stern detail. A few good deck shots also. (Also, for those who want in-depth information and photos on Titanic’s construction, powerplant, etc. this book is great.)
Titanic by Leo Marriot. This book is filled with a large amount of quality photos and good historical information. The book also has many interior photos, although mostly of Olympic. Also has good passenger information and general life on the ship
Unfortunately, not all of the above books are still in print. Both Amazon.com and Alibris.com are good sources for used books and most of the above are not too difficult to find.
Photoetched Brass parts
Photoetched parts are made of extremely fine brass. They are used to replace many smaller model parts that have extremely fine detail. Lifeboat davits, window frames, and vent grills are just a few examples. This allows the modeler to replace many parts that are cast too thickly in plastic with the same parts that have accurate scale sizes and thicknesses. The deluxe 1:350 MiniCraft model already comes with photoetched brass railings; other parts are available through a link on the home page.
Planning your model
First decide what type of model you want to build.
The easiest model to build is a full hull model (supported on a base, showing the bottom, propellers etc.). But if you want something different and/or special, you could also build -
For some interesting examples of different models, and to see what yours can look like, check out the "Finished Model Kits" section on the home page.
Be careful, though! Know your skills and limitations. It’s easy to say "a lighted model is what I want", but the further you move beyond the basic kit, the more skill, expertise, time and patience is required. Many over-ambitious attempts have ended in frustration, disappointment and an "abandoned ship". The good news, though, is that if you think you’re up to the challenge, there’s a lot of help available through this website.
After you decide on what kind of model you want overall, go through the Tutorial. Download it and print it if you’re serious. Decide how many changes you’re capable of and willing to undertake.
Third, plan your general approach. The basic assembly instructions that come with the kit are just that, basic instructions for the basic kit. If you’re adding lighting, for example, you’ll have to plan how the fiber optics will route up through the decks. Once you glue a deck in it will be too late if you’ve forgotten to run some of the fibers to the right place.
Fourth, research and plan further. A good model can’t be built without some careful thought. This is where the Titanic plans come in again. You can use them to see completed sections of the ship, highlight the changes you have to make, and see exactly where parts will go, in the same scale as your own model. At the same time, get a good book or two and study the paintings and/or photos. When you’re assembling, detailing or painting part of the ship, it’s important to see what it looked like in real life. With plastic models, cement is pretty much forever and a picture is worth a thousand curses.
Finally, start your model and have fun. If you’re anxious to get started while you’re doing your research digesting the Tutorial, there’s a lot you can work on before starting the main model itself. Some modelers start on the vents -- there are so many of them it will take you a while to finish them all, even if you’re just cleaning up the ones in the kit without modifying them at all.
TRMA wishes you the best of luck on your Titanic, and when it’s finished, send us some photos to post - we’d love to see how it comes out!
-Written by Art Braunschweiger

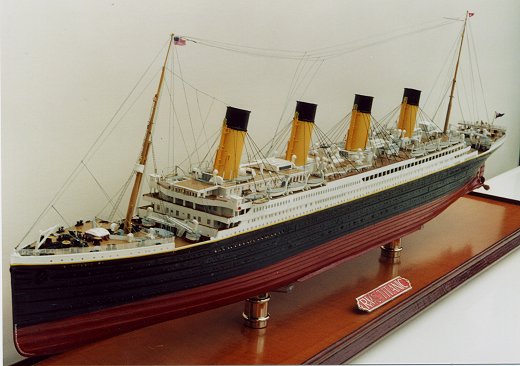
Titanic model completed by Barry Smith